
Creating a patchwork baby carrier is a rewarding and meaningful sewing project that combines creativity, practicality, and care. For beginners, it offers an excellent opportunity to learn essential sewing techniques while crafting something both functional and beautiful. A handmade baby carrier not only provides comfort and closeness but also reflects personal style through carefully chosen fabrics and patterns.
In this comprehensive guide, you will learn how to create a patchwork baby carrier step by step, even if you have little to no prior sewing experience. With attention to detail and a focus on safety, you can produce a durable and aesthetically pleasing carrier that supports both you and your baby.
Understanding the Purpose of a Baby Carrier
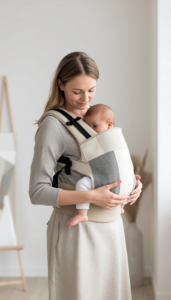
A baby carrier, often referred to as a sling or soft carrier, is designed to hold a baby securely against the caregiver’s body. This allows for hands-free movement while maintaining physical closeness, which is beneficial for bonding and emotional development.
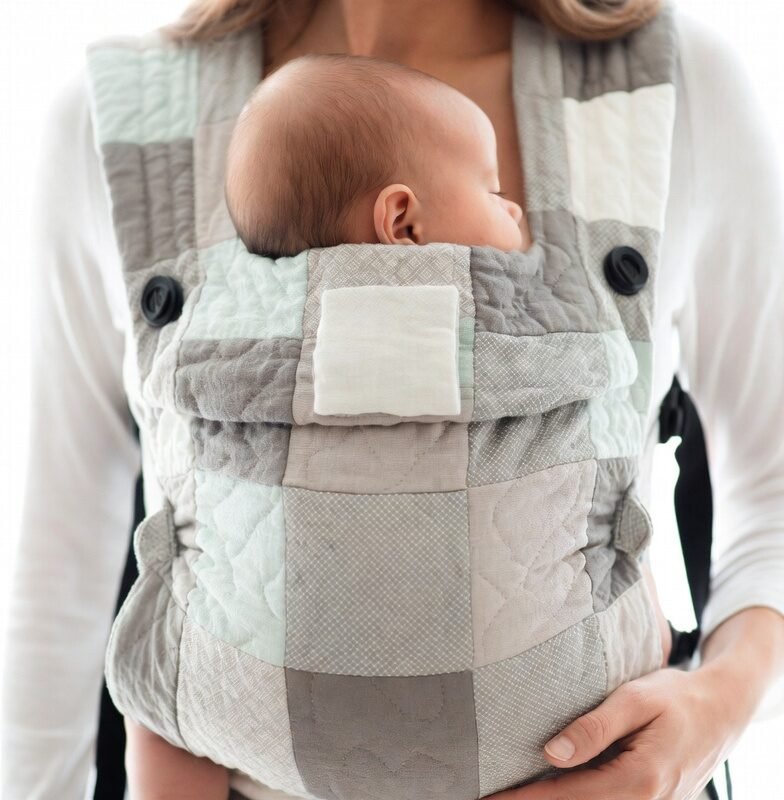
Patchwork carriers stand out because they combine multiple pieces of fabric into a cohesive design. This technique not only adds visual interest but also allows you to repurpose leftover materials, making it both economical and sustainable.
Materials and Tools Required
Before beginning your project, it is important to gather all necessary materials and tools. Choosing the right fabrics and supplies will directly impact the safety and comfort of the final product.
You will need:
- Cotton fabric scraps for the patchwork design
- A strong base fabric such as canvas, twill, or denim
- A soft lining fabric for added comfort (optional but recommended)
- High-quality, durable sewing thread
- A sewing machine
- Fabric scissors or a rotary cutter
- Pins or fabric clips
- A measuring tape
- Fabric chalk or marker
- An iron for pressing seams
When selecting fabrics, prioritize softness and breathability. Avoid materials that are too stretchy or slippery, as they may compromise the stability of the carrier.
Preparing the Patchwork Design
The first step in creating your baby carrier is assembling the patchwork panel. This is where your creativity comes into play.
Begin by cutting your fabric scraps into uniform shapes, such as squares or rectangles. A common size for beginners is 10 cm by 10 cm. Arrange the pieces in a layout that you find visually appealing, balancing colors and patterns to create harmony.
Once satisfied with the arrangement, sew the pieces together row by row. After completing each row, press the seams flat using an iron. Then, join the rows to form a complete panel. Press the entire panel again to ensure a smooth and even surface.
This patchwork panel will serve as the outer layer of your baby carrier.
Reinforcing the Structure
To ensure the carrier can safely support the baby’s weight, reinforcement is essential.
Place the patchwork panel on top of your chosen base fabric. Align the edges carefully and secure the layers with pins or clips. Sew around the edges to join the layers, and consider adding quilting stitches across the surface for additional strength.
This step is critical for durability. A well-reinforced structure ensures that the carrier remains stable during use.
Cutting the Main Body
After reinforcing the fabric, it is time to shape the main body of the carrier.
Using fabric chalk or a marker, draw a slightly curved or ergonomic shape onto the fabric. This design helps distribute the baby’s weight evenly and provides better comfort for both the wearer and the child.
Cut two identical pieces from the reinforced fabric. These will form the front and back panels of the carrier.
Sewing the Main Panel
Place the two panels together with the right sides facing inward. Sew along the edges, leaving a small opening to allow the fabric to be turned inside out.
Once sewn, carefully turn the fabric through the opening so that the right sides are now facing outward. Use an iron to press the edges flat, ensuring a clean and professional finish.
Close the opening with a neat, straight stitch. This seam should be secure and discreet.
Creating the Straps
The straps are a crucial component of the baby carrier, as they bear most of the weight.
To create each strap, fold the fabric lengthwise with the right sides facing inward. Sew along the long edge, then turn the fabric inside out to reveal a clean seam. Press the strap flat with an iron.
For added durability, sew a topstitch along both edges of the strap. This reinforces the structure and prevents the fabric from shifting over time.
Repeat this process to create two shoulder straps.
Attaching the Straps
Position the straps at the upper corners of the main panel. Insert the ends of the straps securely into the seams.
Sew the straps in place using multiple reinforced stitches. A box stitch pattern is highly recommended for maximum strength. This involves sewing a square with diagonal lines inside, creating a strong and reliable hold.
Take your time with this step, as the safety of the carrier depends heavily on the strength of these attachments.
Optional Waist Support
For additional comfort and weight distribution, you may choose to add a waist strap.
This strap can be constructed in the same way as the shoulder straps but may be slightly wider for better support. Attach it to the lower part of the carrier, ensuring it is securely stitched.
A waist strap helps reduce strain on the shoulders and provides a more ergonomic carrying experience.
Safety Considerations
Safety is the most important aspect of any baby carrier. Before using your handmade carrier, perform thorough checks to ensure its reliability.
Test the carrier by applying weight similar to that of a baby. Inspect all seams and stitches for any signs of weakness. Reinforce any areas that appear fragile.
Always ensure that the baby is positioned correctly, with proper support for the head, neck, and hips. The baby’s airway should remain clear at all times.
Never leave the baby unattended while using the carrier, and avoid activities that could pose a risk, such as bending forward or engaging in strenuous movement.
Design and Personalization
One of the greatest advantages of patchwork is the ability to personalize your creation.
You can experiment with different color schemes, from soft pastels to bold contrasts. Adding decorative elements such as borders, piping, or quilting patterns can enhance the overall appearance.
Some creators choose to include small pockets for convenience, while others focus on minimalist designs for a clean and modern look.
The possibilities are endless, allowing you to create a carrier that reflects your unique style.
Maintenance and Care
Proper care will extend the life of your baby carrier.
Wash the carrier using a mild detergent and avoid harsh chemicals that could irritate the baby’s skin. Use cold or warm water and allow the carrier to air dry whenever possible.
Regularly inspect the carrier for signs of wear and tear. Promptly repair any loose seams to maintain safety.