
 Tilda
Tilda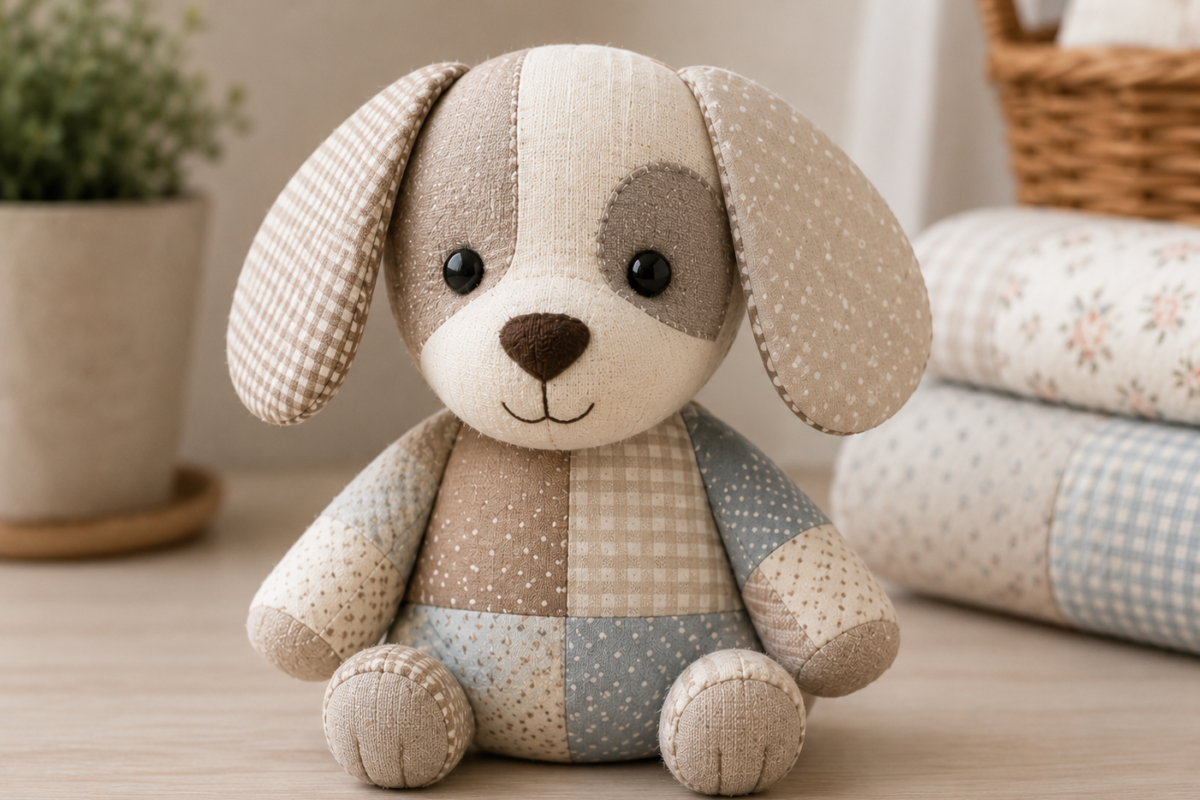
Making a patchwork puppy is one of the most adorable sewing projects for beginners. Besides being fun and creative, it is also a great way to practice basic sewing techniques while creating something soft, cozy, and handmade. A patchwork puppy can become a decorative piece for your home, a child’s toy, a baby shower gift, or even part of a handmade craft business.
Many beginners feel nervous before starting stuffed animal projects because they seem difficult at first. However, when the process is broken into simple steps with clear measurements and easy instructions, creating a patchwork puppy becomes much easier and enjoyable.
This detailed tutorial explains every stage of the project, including fabric measurements, body sizes, sewing techniques, stuffing methods, and finishing details. Even if you have never sewn a stuffed animal before, you can follow this guide and create a beautiful handmade puppy step by step.
Why Patchwork Puppies Are Perfect for Beginners
Patchwork puppies are excellent beginner sewing projects because they combine simple sewing techniques with creative freedom. Unlike clothing projects that require precise fitting, stuffed animals allow more flexibility and creativity.
Small imperfections often make handmade patchwork toys look even more charming and unique.
This project helps beginners learn:
- Fabric cutting
- Straight sewing
- Curved sewing
- Stuffing techniques
- Hand stitching
- Basic patchwork combinations
It is also a relaxing and rewarding craft because you can see the puppy slowly take shape as you work.
Choosing the Best Puppy Size
Before starting, decide what size you want your patchwork puppy to be.
Small Puppy
Recommended for beginners:
- Height: 8 inches
- Width: 6 inches
Advantages:
- Faster project
- Less fabric needed
- Easier for practice
Medium Puppy
Most popular beginner size:
- Height: 12 inches
- Width: 8 inches
Advantages:
- Easy to sew
- Great for decoration
- Comfortable to cuddle
Large Puppy
Recommended for experienced beginners:
- Height: 18 inches
- Width: 12 inches
Advantages:
- Extra cuddly
- More visible patchwork details
- Great for gifts
For first projects, the medium size usually offers the best balance between simplicity and visual results.
Materials You Will Need
Preparing all materials before starting helps the sewing process feel smoother and more organized.
Fabric
For a medium-sized puppy, you will need:
- 4 to 6 cotton fabric prints
- About 20 x 20 inches of each fabric
Soft neutral or pastel fabrics often create the most cozy appearance.
Popular combinations include:
- Beige and cream
- Soft blue and white
- Floral prints
- Tiny polka dots
- Light plaid fabrics
Stuffing
You will need:
- Polyester fiberfill stuffing
Recommended amount:
- Approximately 200 to 300 grams
The stuffing should feel soft but still provide structure.
Sewing Supplies
You will also need:
- Sewing machine
- Hand sewing needle
- Matching thread
- Sharp fabric scissors
- Pins or clips
- Fabric marker
- Measuring ruler
- Iron
Optional decorative supplies:
- Ribbon
- Felt
- Embroidery thread
- Safety eyes
Puppy Pattern Measurements
This beginner pattern uses simple rounded shapes that are easy to sew.
Body Pieces
Cut:
- 2 body pieces
Measurement:
- 12 inches tall
- 8 inches wide
The body should have rounded edges instead of sharp corners.
Ear Pieces
Cut:
- 4 ear pieces
Measurement:
- 5 inches long
- 3 inches wide
Floppy ears create a softer and cuter appearance.
Arm Pieces
Cut:
- 4 arm pieces
Measurement:
- 4 inches long
- 2 inches wide
Rounded arms are easier for beginners to sew.
Leg Pieces
Cut:
- 4 leg pieces
Measurement:
- 3 inches long
- 2.5 inches wide
Shorter legs create a balanced and adorable puppy shape.
Tail Pieces
Cut:
- 2 tail pieces
Measurement:
- 4 inches long
- 1.5 inches wide A small curved tail works best for beginners.
Step 1: Preparing the Fabric
Wash and iron all fabrics before cutting. This helps remove wrinkles and prevents future shrinking.
Place your fabrics on a clean flat surface and organize the color combinations before cutting.
Patchwork projects look best when:
- Colors feel balanced
- Patterns are mixed carefully
- Large prints are combined with smaller prints
Take your time selecting combinations because this strongly affects the final appearance.
Step 2: Cutting the Patchwork Pieces
For the puppy body, divide the fabric into patchwork squares.
Recommended beginner square size:
- 2.5 x 2.5 inches
You will need:
- Around 24 small squares for the front
- Around 24 small squares for the back
Use a ruler carefully and cut slowly for clean edges.
Accurate cutting is important because uneven squares can create sewing problems later.
Step 3: Creating the Patchwork Panels
Arrange the small squares on a table before sewing.
This stage allows you to:
- Balance colors
- Rearrange patterns
- Avoid repeating prints too closely
Once satisfied with the layout:
- Sew squares into rows
- Then sew rows together
Use:
- Quarter-inch seam allowance
Press seams with an iron after every row.
The finished patchwork panel should measure approximately:
- 13 x 9 inches before trimming
Step 4: Cutting the Puppy Shape
Place the puppy body pattern over the finished patchwork panel.
Cut carefully around the shape.
Repeat for the back side.
At this stage, the puppy body finally starts becoming visible.
The rounded body shape gives the puppy a softer and friendlier appearance.
Step 5: Sewing the Ears
Place two ear pieces together with right sides facing inward.
Sew around the curved edges while leaving the top open.
Turn right side out and lightly stuff if desired.
Floppy ears usually look best with very little stuffing.
Repeat for both ears.
Step 6: Sewing the Arms and Legs
Sew arm and leg pieces using the same method:
- Right sides together
- Sew around edges
- Leave opening for turning
After turning:
- Add small amounts of stuffing
Do not overstuff because smaller limbs should remain soft and flexible.
Short rounded legs often make the puppy look cuter and more beginner-friendly.
Step 7: Assembling the Puppy
Now the exciting part begins.
Place:
- Ears facing inward
- Arms inward
- Legs inward
- Tail inward
Position everything between the front and back body pieces.
Pin carefully before sewing.
Sew slowly around the entire body while leaving a small opening near the bottom for stuffing.
Take extra care around curves and corners.
Step 8: Turning the Puppy Right Side Out
Carefully pull the puppy through the opening.
Use a blunt object to gently push out:
- Ears
- Legs
- Tail
- Rounded corners
At this stage, the puppy finally becomes three-dimensional.
This is often the moment beginners feel most excited because the project starts looking complete.
Step 9: Stuffing the Puppy
Begin adding stuffing slowly.
Recommended stuffing order:
- Head
- Arms
- Legs
- Body
Use small amounts at a time.
The puppy should feel:
- Soft
- Cuddly
- Slightly firm
Avoid overstuffing because it may stretch seams and distort the shape.
Step 10: Closing the Opening
Fold the raw edges inward and close the opening using hand stitching.
An invisible ladder stitch creates the cleanest finish.
Take your time during this step because neat stitches improve the final appearance significantly.
Step 11: Adding the Face
The face gives personality to the puppy.
You can use:
- Embroidery thread
- Safety eyes
- Felt pieces
- Buttons
Beginners often prefer embroidered eyes because they are safer and easier to customize.
Simple facial details often look more charming than overly complicated expressions.
A tiny smile and soft nose create a sweet handmade appearance.
Step 12: Decorative Details
Now it is time to personalize the puppy.
Popular ideas include:
- Ribbon collars
- Tiny bows
- Fabric hearts
- Mini scarves
- Personalized names
Soft neutral colors often create a calming and cozy appearance perfect for nursery decor or gifts.
Common Beginner Mistakes
Uneven Fabric Squares
Careful measuring improves alignment.
Rushing Curves
Curved sewing requires patience and slower stitching.
Too Much Stuffing
Overstuffing creates bulky uneven shapes.
Ignoring Ironing
Pressed seams make the puppy look cleaner and more professional.
Complicated Patterns
Simple patchwork designs work best for first projects.
Final Thoughts
Making a patchwork puppy for beginners is a creative and relaxing sewing project that teaches important sewing skills while producing something adorable and meaningful.
By following simple steps, using beginner-friendly measurements, and choosing soft harmonious fabrics, even complete beginners can create a beautiful handmade puppy with confidence.
The beauty of patchwork lies in its uniqueness. Every puppy will have its own personality, charm, and handmade character depending on the fabrics and details you choose.
Start slowly, enjoy each step, and remember that every finished project helps improve your sewing skills and creativity. Your first patchwork puppy may become not only a beautiful decoration but also the beginning of a lifelong passion for handmade sewing projects.