

The Flying Geese quilt block is a classic quilting design that looks advanced but is surprisingly beginner-friendly when broken down into simple steps. This block is known for its strong visual movement and is commonly used in borders, rows, and statement quilt designs.
If you’re ready to move beyond basic square blocks while still keeping things manageable, this beginner-friendly Flying Geese quilt block tutorial is the perfect next step.
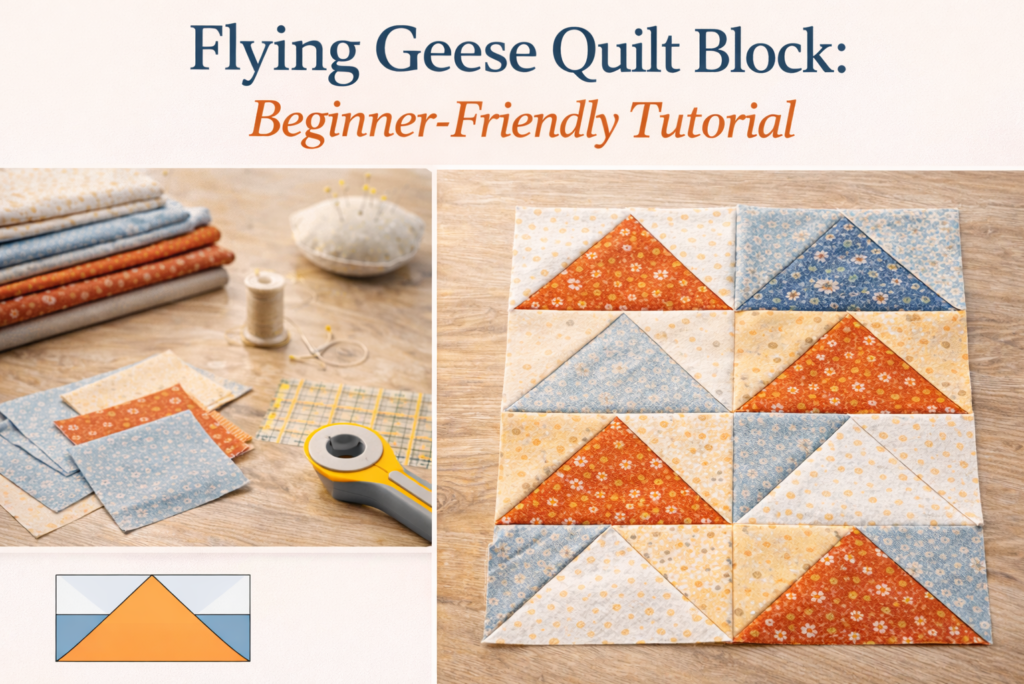
What Is a Flying Geese Quilt Block?
A Flying Geese block consists of one large triangle (the “goose”) centered between two smaller triangles (the “sky”), forming a rectangular unit.
The name comes from the repeated triangular shapes that resemble geese flying in formation when blocks are placed in rows.
Why Flying Geese Is Great for Beginners
Although it involves triangles, Flying Geese blocks are very approachable for beginners.
Beginner Advantages
- Straight seams only
- Repeatable construction
- Great introduction to triangles
- Builds accuracy and confidence
- Works well in many quilt styles
Once you understand the method, Flying Geese blocks are fast and fun to make.
Finished Size of Flying Geese Blocks
Flying Geese blocks are rectangular, not square.
Common finished sizes:
- 3″ x 6″
- 4″ x 8″
- 5″ x 10″
The width is always twice the height, which keeps proportions balanced.
Supplies You’ll Need
Fabric
- 1 fabric for the “goose” (center triangle)
- 1 or 2 fabrics for the “sky” (side triangles)
- 100% cotton quilting fabric
Tools
- Rotary cutter
- Cutting mat
- Quilting ruler
- Sewing machine
- Iron
- Pins or clips
Best Method for Beginners: No-Waste Flying Geese
The no-waste method is the most beginner-friendly way to make Flying Geese units.
Why Beginners Love This Method
- Minimal fabric waste
- Accurate results
- Makes four units at once
- No specialty rulers required
Step-by-Step Flying Geese Tutorial (No-Waste Method)
Step 1: Cut Your Fabric Squares
To make four Flying Geese units:
- Cut one large square (goose fabric)
- Cut four small squares (sky fabric)
Example for 4″ x 8″ finished units:
- Large square: 9¼”
- Small squares: 5″
Step 2: Mark the Small Squares
On the wrong side of each small square:
- Draw a diagonal line corner to corner
This line will guide your stitching.
Step 3: Sew the First Two Sky Squares
Place two small squares on opposite corners of the large square, right sides together.
- Sew ¼” away from the diagonal line on both sides
- Cut along the drawn line
- Press the triangles outward
You now have two heart-shaped units.
Step 4: Add the Remaining Sky Squares
Place one small square on the corner of each unit.
- Sew ¼” on both sides of the diagonal line
- Cut along the line
- Press seams outward
You now have four Flying Geese units.
Step 5: Trim and Square the Units
Trim each unit to its unfinished size.
Why trimming matters:
- Ensures accuracy
- Makes blocks fit together
- Improves quilt quality
Pressing Tips for Flying Geese Blocks
Good pressing makes a huge difference with triangle blocks.
Best Practices
- Press seams toward the sky fabric
- Avoid stretching bias edges
- Use a gentle lifting motion
Flat blocks = easier assembly later.
Common Beginner Mistakes (and How to Avoid Them)
❌ Skipping trimming
Always trim to size
❌ Stretching triangles
Handle pieces gently
❌ Poor fabric contrast
Choose clear light/dark difference
Easy Flying Geese Variations
Once you master the basics, try these beginner-friendly variations.
Scrappy Flying Geese
Use different fabrics for each goose for a playful look.
Two-Color Flying Geese
Simple and modern — perfect for clean designs.
Directional Flying Geese
Rotate units to create zigzag or chevron patterns.
Where to Use Flying Geese Blocks
Flying Geese units are extremely versatile.
Perfect for:
- Quilt borders
- Rows between blocks
- Statement quilt designs
- Modern quilts
They pair beautifully with Nine Patch and Rail Fence blocks.
Flying Geese vs Rail Fence (Beginner Comparison)
| Feature | Flying Geese | Rail Fence |
|---|---|---|
| Shape | Rectangular | Square |
| Speed | Moderate | Fast |
| Skill Level | Beginner+ | Beginner |
| Visual Impact | Dynamic | Bold |
Both are excellent blocks for skill-building.
Tips for First-Time Success
- Practice with scraps first
- Mark lines clearly
- Sew slowly and accurately
- Don’t skip trimming
Every unit improves your technique.
Final Thoughts
The Flying Geese quilt block may look advanced, but with the right method, it’s completely achievable for beginners. This block introduces triangle piecing while remaining structured and forgiving.
Once you master Flying Geese, you’ll unlock endless layout possibilities and take your quilting skills to the next level.
It’s a powerful block that adds movement and energy to any quilt