
The Nine Patch quilt block is one of the most popular and beginner-friendly quilt blocks of all time. Simple, versatile, and incredibly forgiving, it’s often the very first block new quilters learn — and for good reason.
If you’re just starting your quilting journey, this step-by-step Nine Patch quilt block tutorial will help you build confidence, improve accuracy, and create a beautiful foundation for future projects.
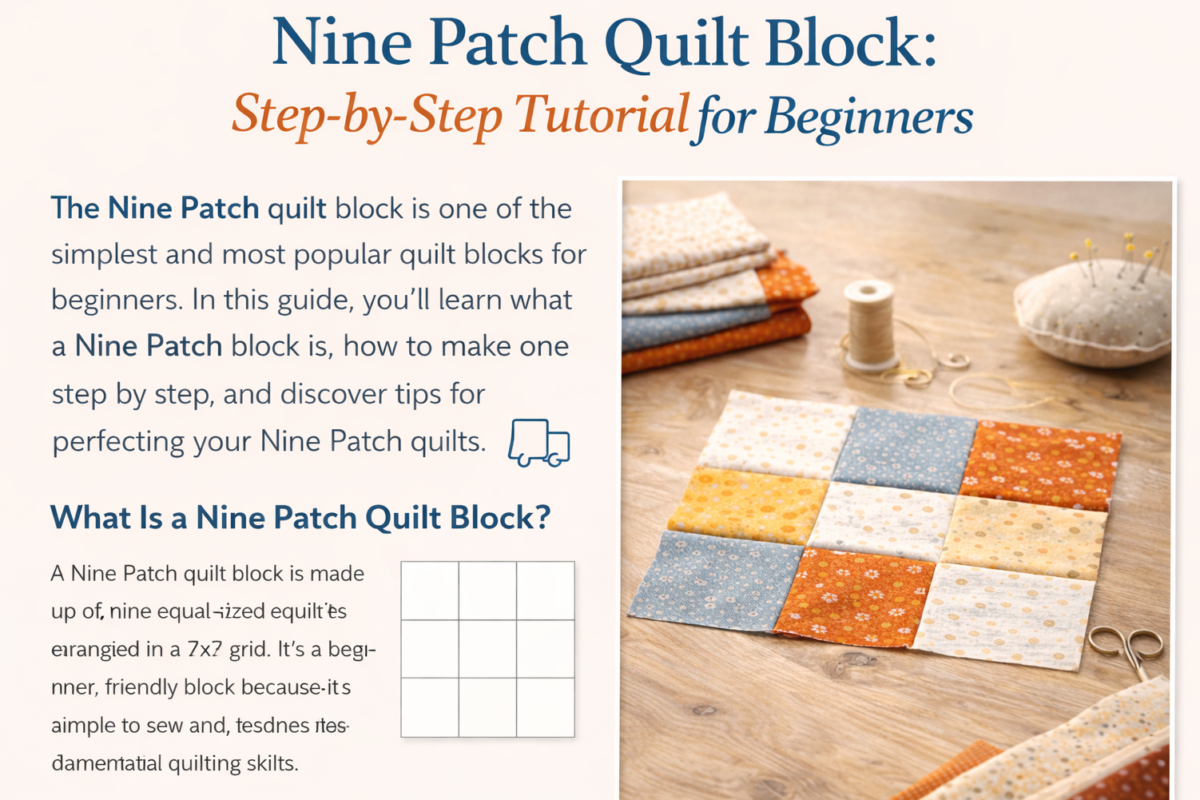
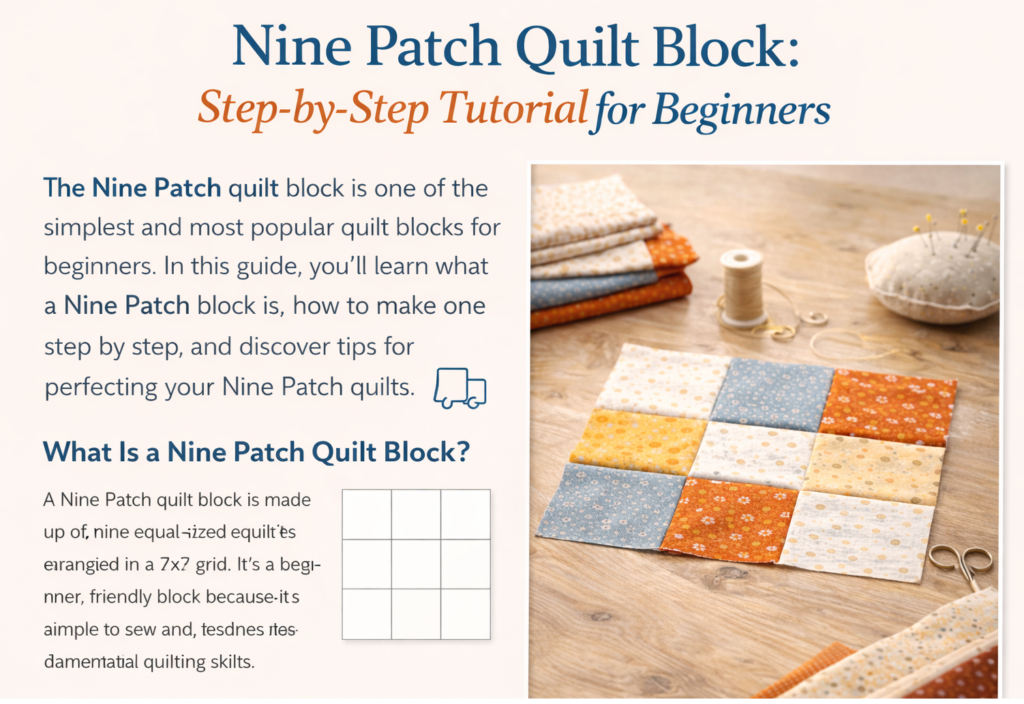
What Is a Nine Patch Quilt Block?
A Nine Patch quilt block is made of nine equally sized fabric squares, arranged in a 3×3 grid. Despite its simplicity, this block offers endless design possibilities by changing fabric colors, contrast, and layout.
Why Beginners Love the Nine Patch Block
- Easy construction with straight seams
- No complex cutting or angles
- Perfect for scrap fabric
- Helps master accurate piecing and seam allowance
This block teaches essential quilting skills that apply to nearly every quilt pattern.
Finished Size of a Nine Patch Quilt Block
Common finished sizes include:
- 9″ x 9″ (most popular for beginners)
- 6″ x 6″
- 12″ x 12″
In this tutorial, we’ll focus on a 9-inch finished block, which means each square finishes at 3 inches.
Supplies You’ll Need
Before starting, gather these basic quilting supplies:
Fabric
- 3 coordinating fabrics (light, medium, dark works best)
- 100% cotton quilting fabric
Tools
- Rotary cutter
- Quilting ruler
- Cutting mat
- Sewing machine
- Iron and ironing board
- Pins or clips
Step 1: Choose Your Fabric Colors
Fabric placement is what gives the Nine Patch its personality.
Beginner Fabric Tips
- Choose high contrast fabrics so the pattern stands out
- Avoid busy prints for your first block
- Use scraps or fat quarters
A classic look uses:
- 5 squares of one fabric
- 4 squares of a contrasting fabric
Step 2: Cut the Fabric Squares
For a 9-inch finished block, cut:
- Nine squares measuring 3½” x 3½”
Quilting tip: Always cut slightly larger to account for seam allowance.
Double-check measurements before sewing — accuracy here saves frustration later.
Step 3: Arrange the Layout
Lay your squares out in a 3×3 grid before sewing.
Popular layouts include:
- Checkerboard style
- Center square as a contrasting color
- Scrappy arrangement
Take a photo of your layout to avoid confusion while sewing.
Step 4: Sew the Rows
Sew the block together row by row.
How to Sew
- Use a ¼-inch seam allowance
- Sew the first row (3 squares)
- Press seams to one side
- Repeat for rows two and three
Consistency is more important than speed.
Step 5: Press the Seams Correctly
Pressing is key to a flat, professional-looking block.
Pressing Tips for Beginners
- Press seams in alternating directions for each row
- This helps seams “nest” when rows are joined
- Avoid ironing back and forth — lift and press
Step 6: Join the Rows
Now sew the three rows together.
- Match seam intersections carefully
- Pin where seams meet for accuracy
- Sew slowly and steadily
Once joined, press the final seams.
Step 7: Square Up the Block
Trim your block to ensure it’s perfectly square.
Why Squaring Matters
- Makes blocks fit together easily
- Improves overall quilt appearance
- Prevents puckering later
Your finished block should measure 9½” x 9½” unfinished.
Easy Nine Patch Variations for Beginners
Once you master the basic block, try these variations:
Scrappy Nine Patch
Use different fabrics in every square for a playful look.
Disappearing Nine Patch
Cut the finished block into sections and rearrange for a more advanced design.
Two-Color Nine Patch
Simple, bold, and perfect for modern quilts.
How to Use Nine Patch Blocks in a Quilt
Nine Patch blocks work beautifully in:
- Baby quilts
- Lap quilts
- Table runners
- Patchwork blankets
Combine them with sashing or alternate blocks for visual interest.
Common Beginner Mistakes (and How to Avoid Them)
❌ Inconsistent seam allowance
Use a ¼-inch foot or marking guide
❌ Fabric shifting while sewing
Pin or chain-piece rows
❌ Skipping pressing
Press after every step
Mistakes are part of learning — every block makes you better.
Why the Nine Patch Is Perfect for Your First Quilt
This block builds:
- Confidence
- Accuracy
- Muscle memory
- Understanding of block construction
It’s simple, forgiving, and endlessly useful.
Final Thoughts
Learning how to make a Nine Patch quilt block is a huge milestone for beginner quilters. This block may look basic, but it’s the foundation of countless classic and modern quilt designs.
Practice with scraps, experiment with colors, and most importantly — enjoy the process. Every great quilter started with a simple block like this.
Your quilting journey has officially begun