
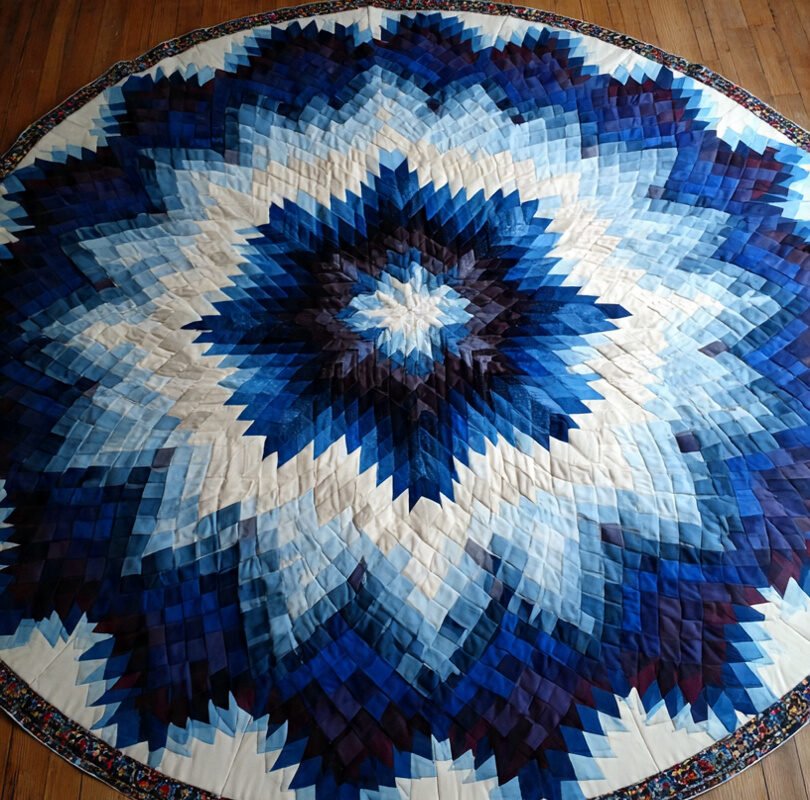
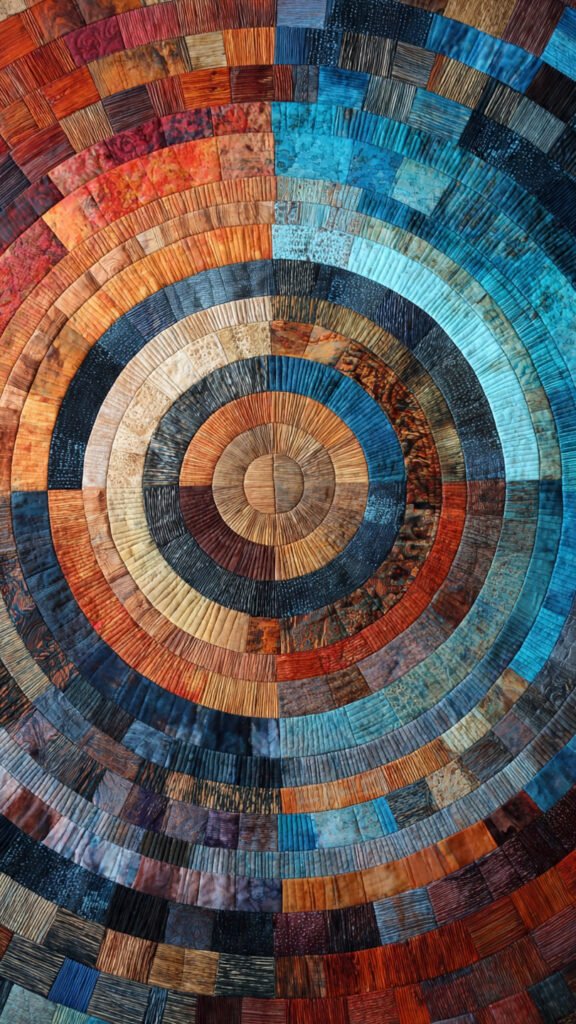
The Circular Log Cabin quilt is a creative and modern variation of the traditional Log Cabin pattern. Instead of growing into a square block, this version builds outward in a continuous spiral, creating a circular or rounded visual effect that adds movement and artistic appeal to the quilt.
In this article, you’ll learn how to make a Circular Log Cabin quilt step by step, from planning to final finishing.
What Is the Log Cabin Pattern?
The Log Cabin pattern is built around a central square, often called the “hearth,” with fabric strips (“logs”) added one by one around it.
In the circular version, these strips are added in a continuous direction, forming a spiral that visually mimics a circular shape.
Materials Needed
Before you begin, gather the following materials:
- Cotton fabric for patchwork
- Rotary cutter or scissors
- Quilting ruler
- Sewing machine or hand-sewing needle
- Thread
- Quilting batting
- Backing fabric
- Pins or clips
💡 Tip: High-contrast fabrics enhance the spiral effect of a circular Log Cabin quilt.
Planning Your Circular Log Cabin Quilt
Good planning is essential for a successful quilt.
Decide in advance:
- The final size of the quilt
- A color palette (light-to-dark transitions work beautifully)
- The width of the fabric strips
- Whether the quilt will be fully circular or visually circular within a square
Planning helps avoid mistakes and fabric waste.
Step-by-Step: How to Make a Circular Log Cabin Quilt
1. Create the Center Block
- Cut a small center square (for example, 3 x 3 inches).
- This square is the foundation of the quilt.
- Sew carefully and press the fabric flat.
2. Add the First Log
- Cut a fabric strip the same length as one side of the center square.
- Sew it to one side of the square.
- Press the seam before continuing.
3. Build the Spiral
- Continue adding fabric strips around the center, always rotating in the same direction (clockwise or counterclockwise).
- Each strip should match the growing length of the block.
- Alternate colors to emphasize the spiral movement.
This continuous rotation is what creates the circular Log Cabin effect.
4. Shape the Circular Look
- As the quilt grows, the corners will naturally soften the shape.
- To enhance the circular appearance, you can:
- Use narrower strips
- Trim corners slightly
- Focus on gradual color transitions
The visual illusion creates the circular design even if the quilt remains square overall.
5. Continue Until Desired Size
Repeat the process of adding strips until the quilt reaches the planned dimensions.
Measure frequently to keep the quilt balanced and even.
Assembling the Quilt Layers
Once the quilt top is complete:
- Layer the quilt top, batting, and backing fabric
- Secure all layers with pins or clips
- Quilt by hand or machine
- Finish with binding around the edges
Helpful Tips for Best Results
- Press seams after every strip
- Keep strip widths consistent
- Use strong contrast for better visual impact
- Take your time—accuracy matters
Who Is This Quilt Style Best For?
The Circular Log Cabin quilt is ideal for:
- Quilters with basic patchwork experience
- Those who enjoy modern or artistic designs
- Decorative quilts and statement pieces
- Unique handmade items for gifting or selling
Conclusion
The Circular Log Cabin quilt is a striking blend of tradition and creativity. While it requires careful planning and attention to detail, the final result is a unique, flowing design that stands out beautifully.
With patience and thoughtful fabric choices, you can create a quilt that feels both classic and contemporary.